
Discover Studio AI
Build a small Mule flow from an empty project. You ask in Plan mode first, so you see what the AI wants to do before any file changes. You need the plugin installed and a provider set up.
1. Plan the flow
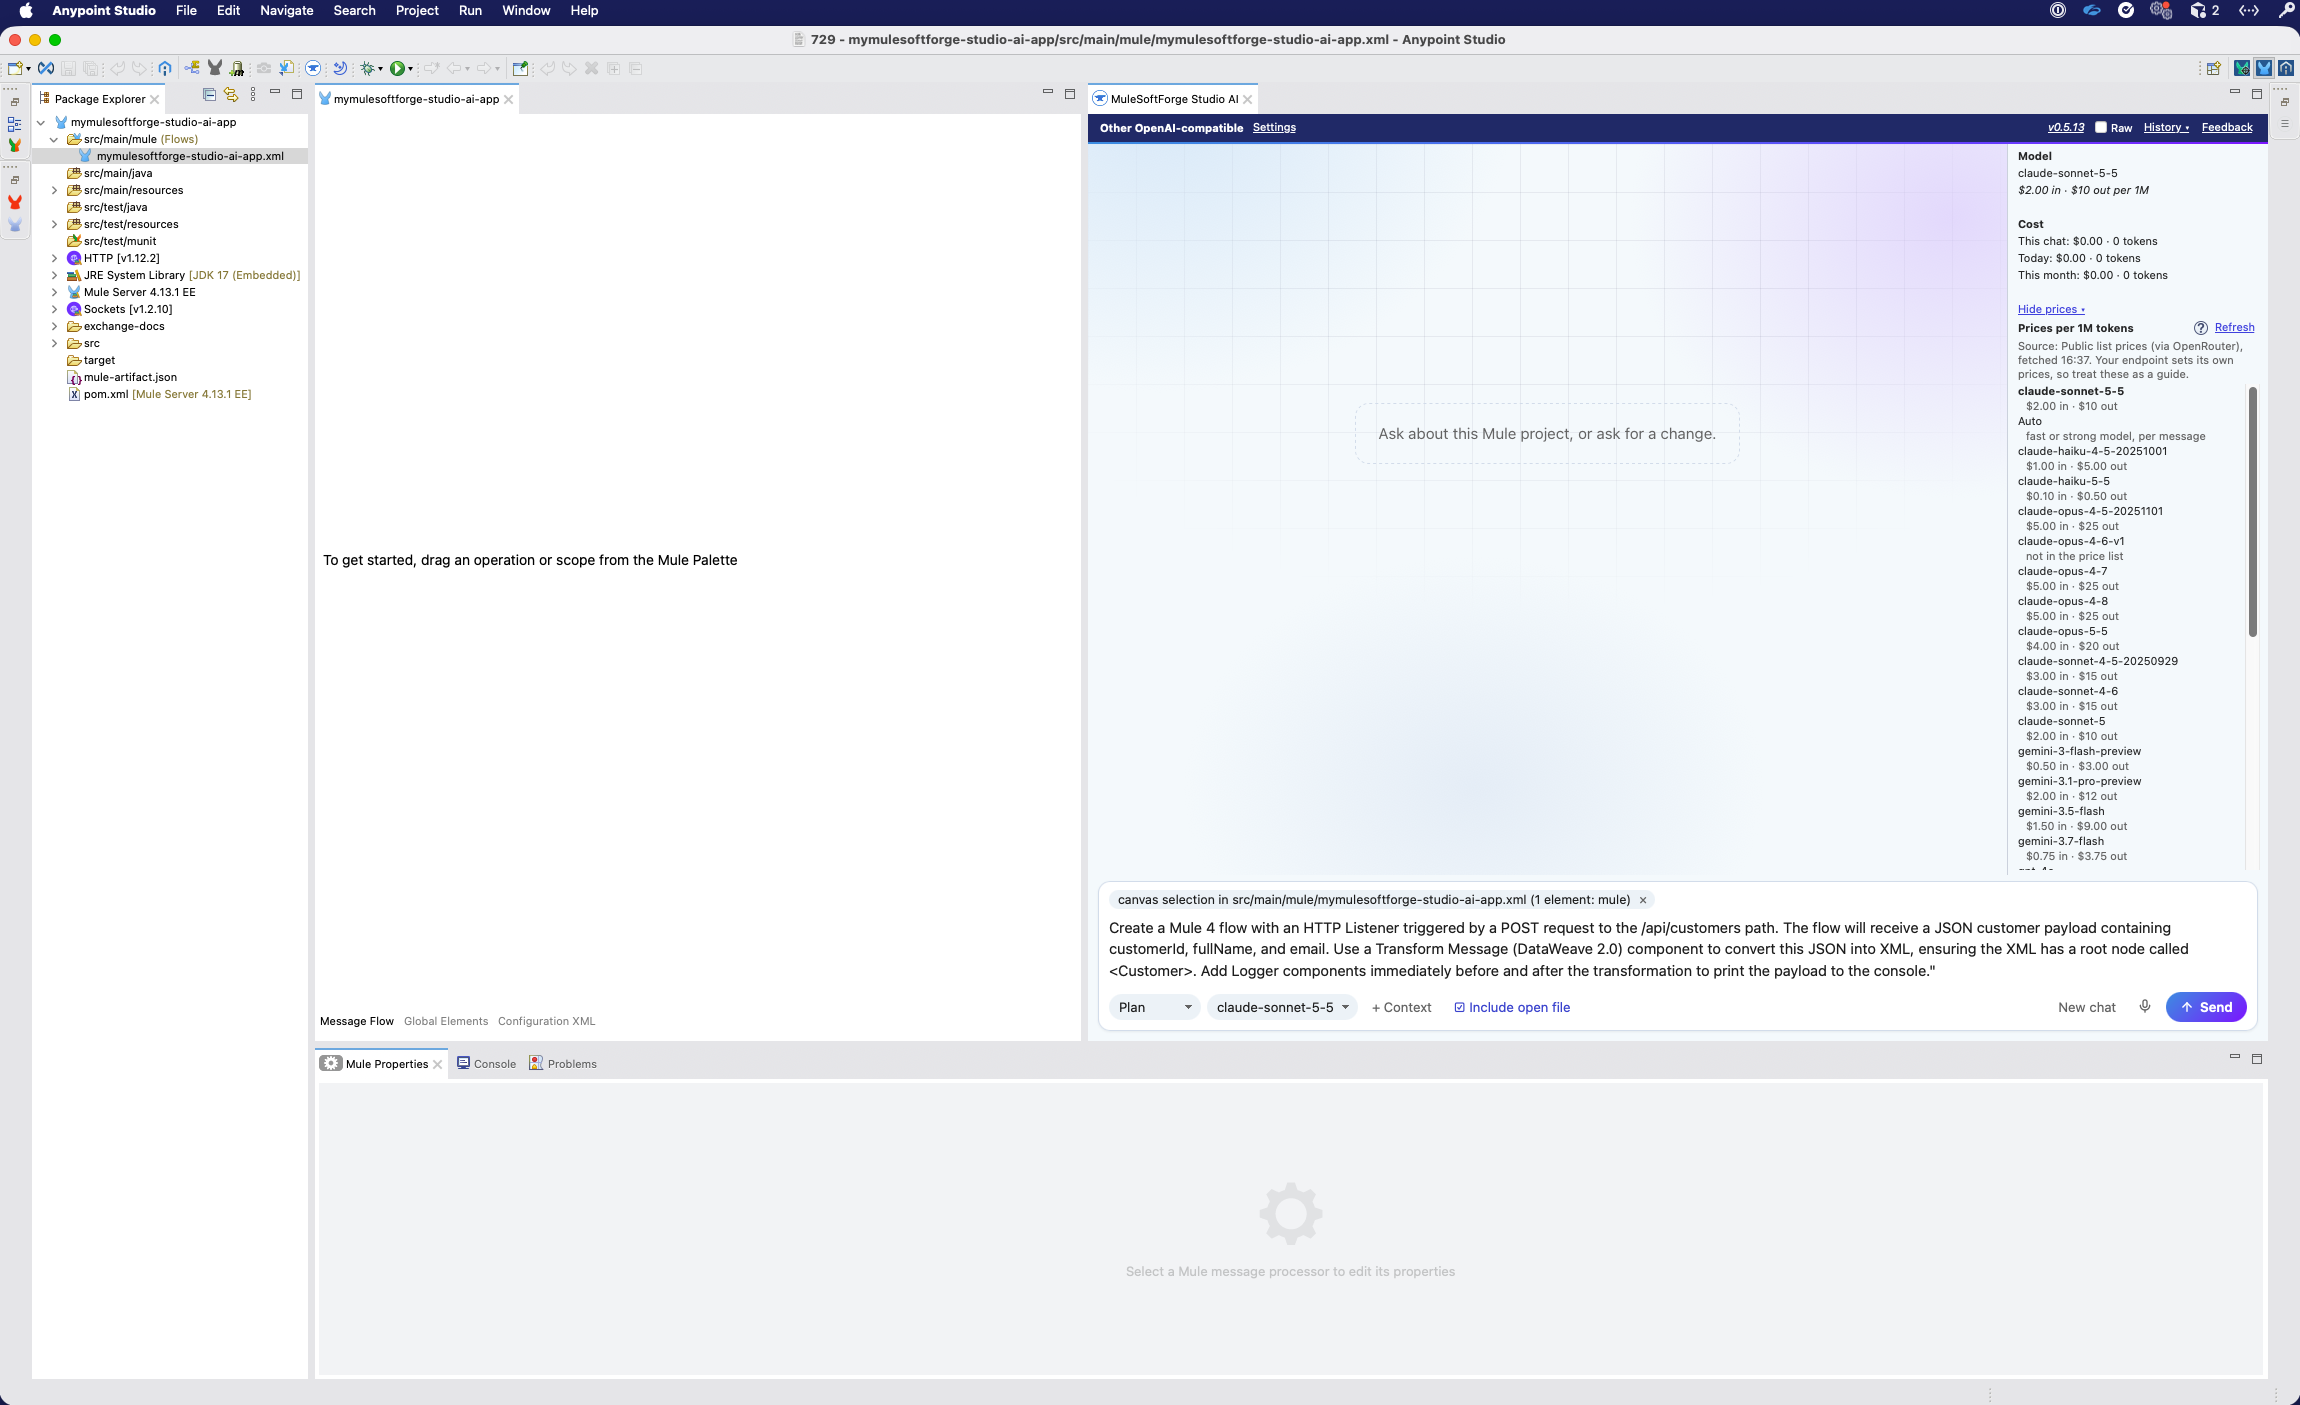
Create the project mymulesoftforge-studio-ai-app, open MuleSoftForge Studio AI, select Plan, and paste this prompt:
Create a Mule 4 flow with an HTTP Listener triggered by a POST request to the /api/customers path. The flow will receive a JSON customer payload containing customerId, fullName, and email. Use a Transform Message (DataWeave 2.0) component to convert this JSON into XML, ensuring the XML has a root node called <Customer>. Add Logger components immediately before and after the transformation to print the payload to the console.Plan mode reads the project and answers with a plan. It does not change files. To learn more about the modes, see Use the chat.
Create the project and ask in Plan mode
Choose File > New > Mule Project. For Project Name, type mymulesoftforge-studio-ai-app and click Finish. Open MuleSoftForge Studio AI, select Plan, paste the prompt below, and click Send. Plan mode reads the project and writes a plan. It does not change files.
All 3 steps as a list
- Create the project and ask in Plan mode. Choose File > New > Mule Project. For Project Name, type
mymulesoftforge-studio-ai-appand click Finish. Open MuleSoftForge Studio AI, select Plan, paste the prompt below, and click Send. Plan mode reads the project and writes a plan. It does not change files. - Plan mode works. The steps show Following your instructions, Listing project root, Looking up http and Running DataWeave on sample input. Wait for the plan.
- Review the plan. The plan is ready. Changes it can make lists one ticked change for the HTTP Listener, Transform Message and Loggers. Click Draft selected changes for review.
2. Build it in Agent mode
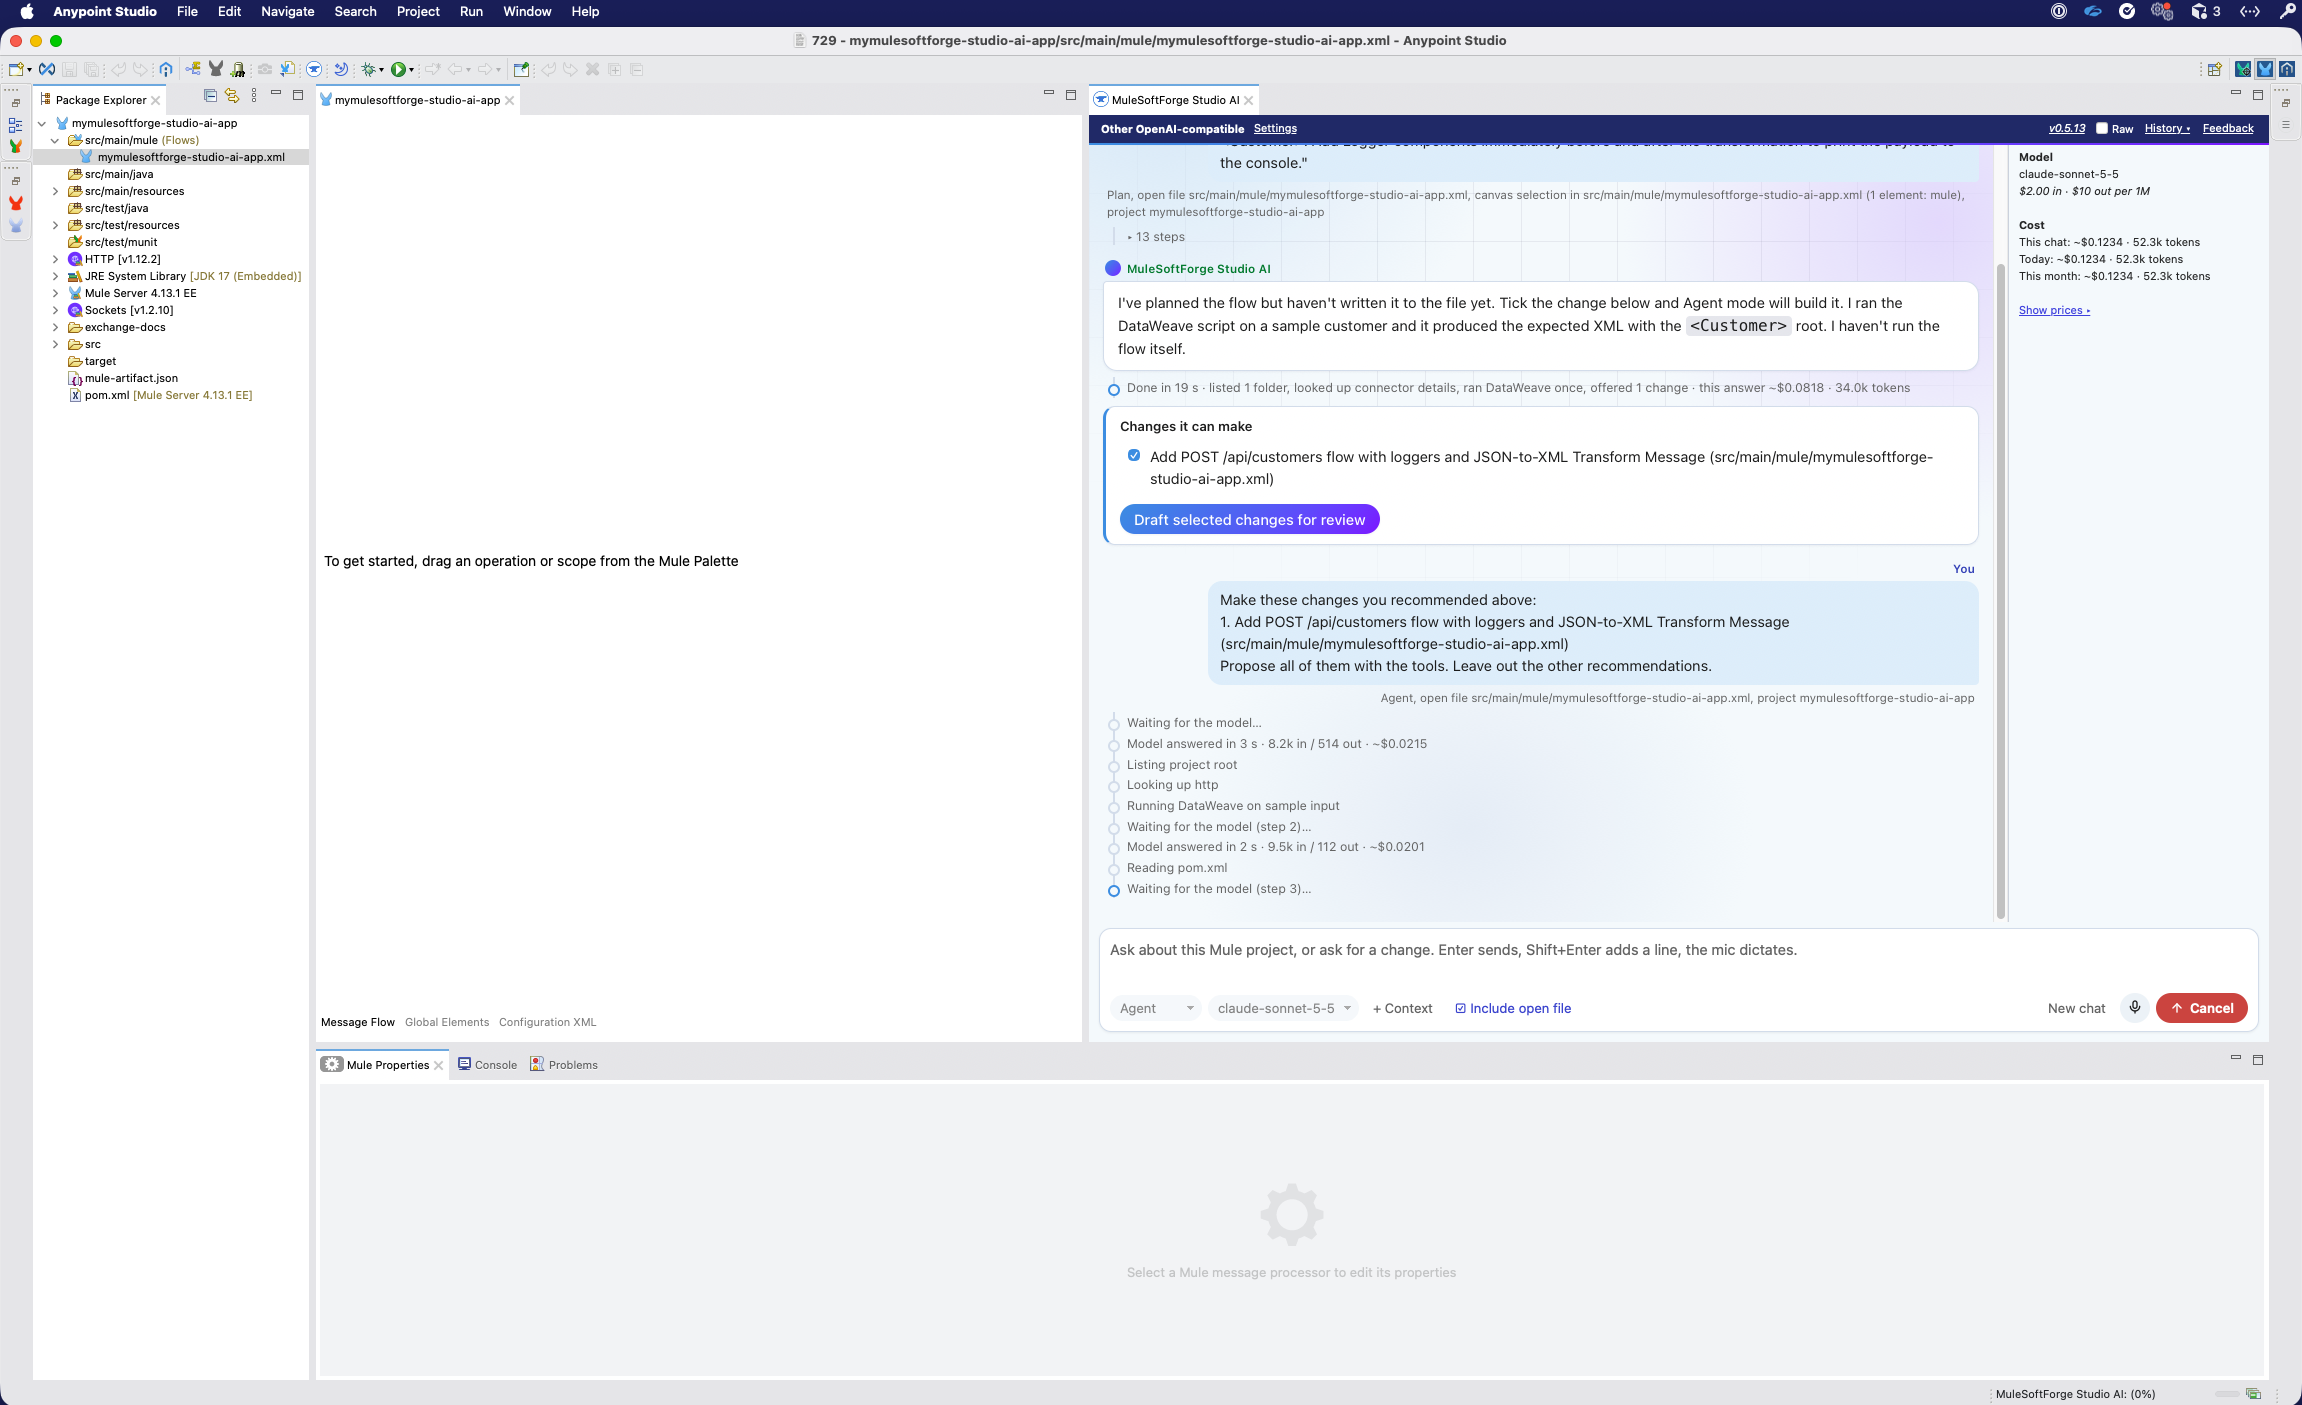
Draft selected changes for review switches to Agent mode. Review the proposed files, then Accept. The flow appears on the canvas.
Agent mode drafts the change
The view switches to Agent mode and drafts the change. Wait for the proposed files.
All 3 steps as a list
- Agent mode drafts the change. The view switches to Agent mode and drafts the change. Wait for the proposed files.
- Review the proposed files. Proposed changes (2 files) lists
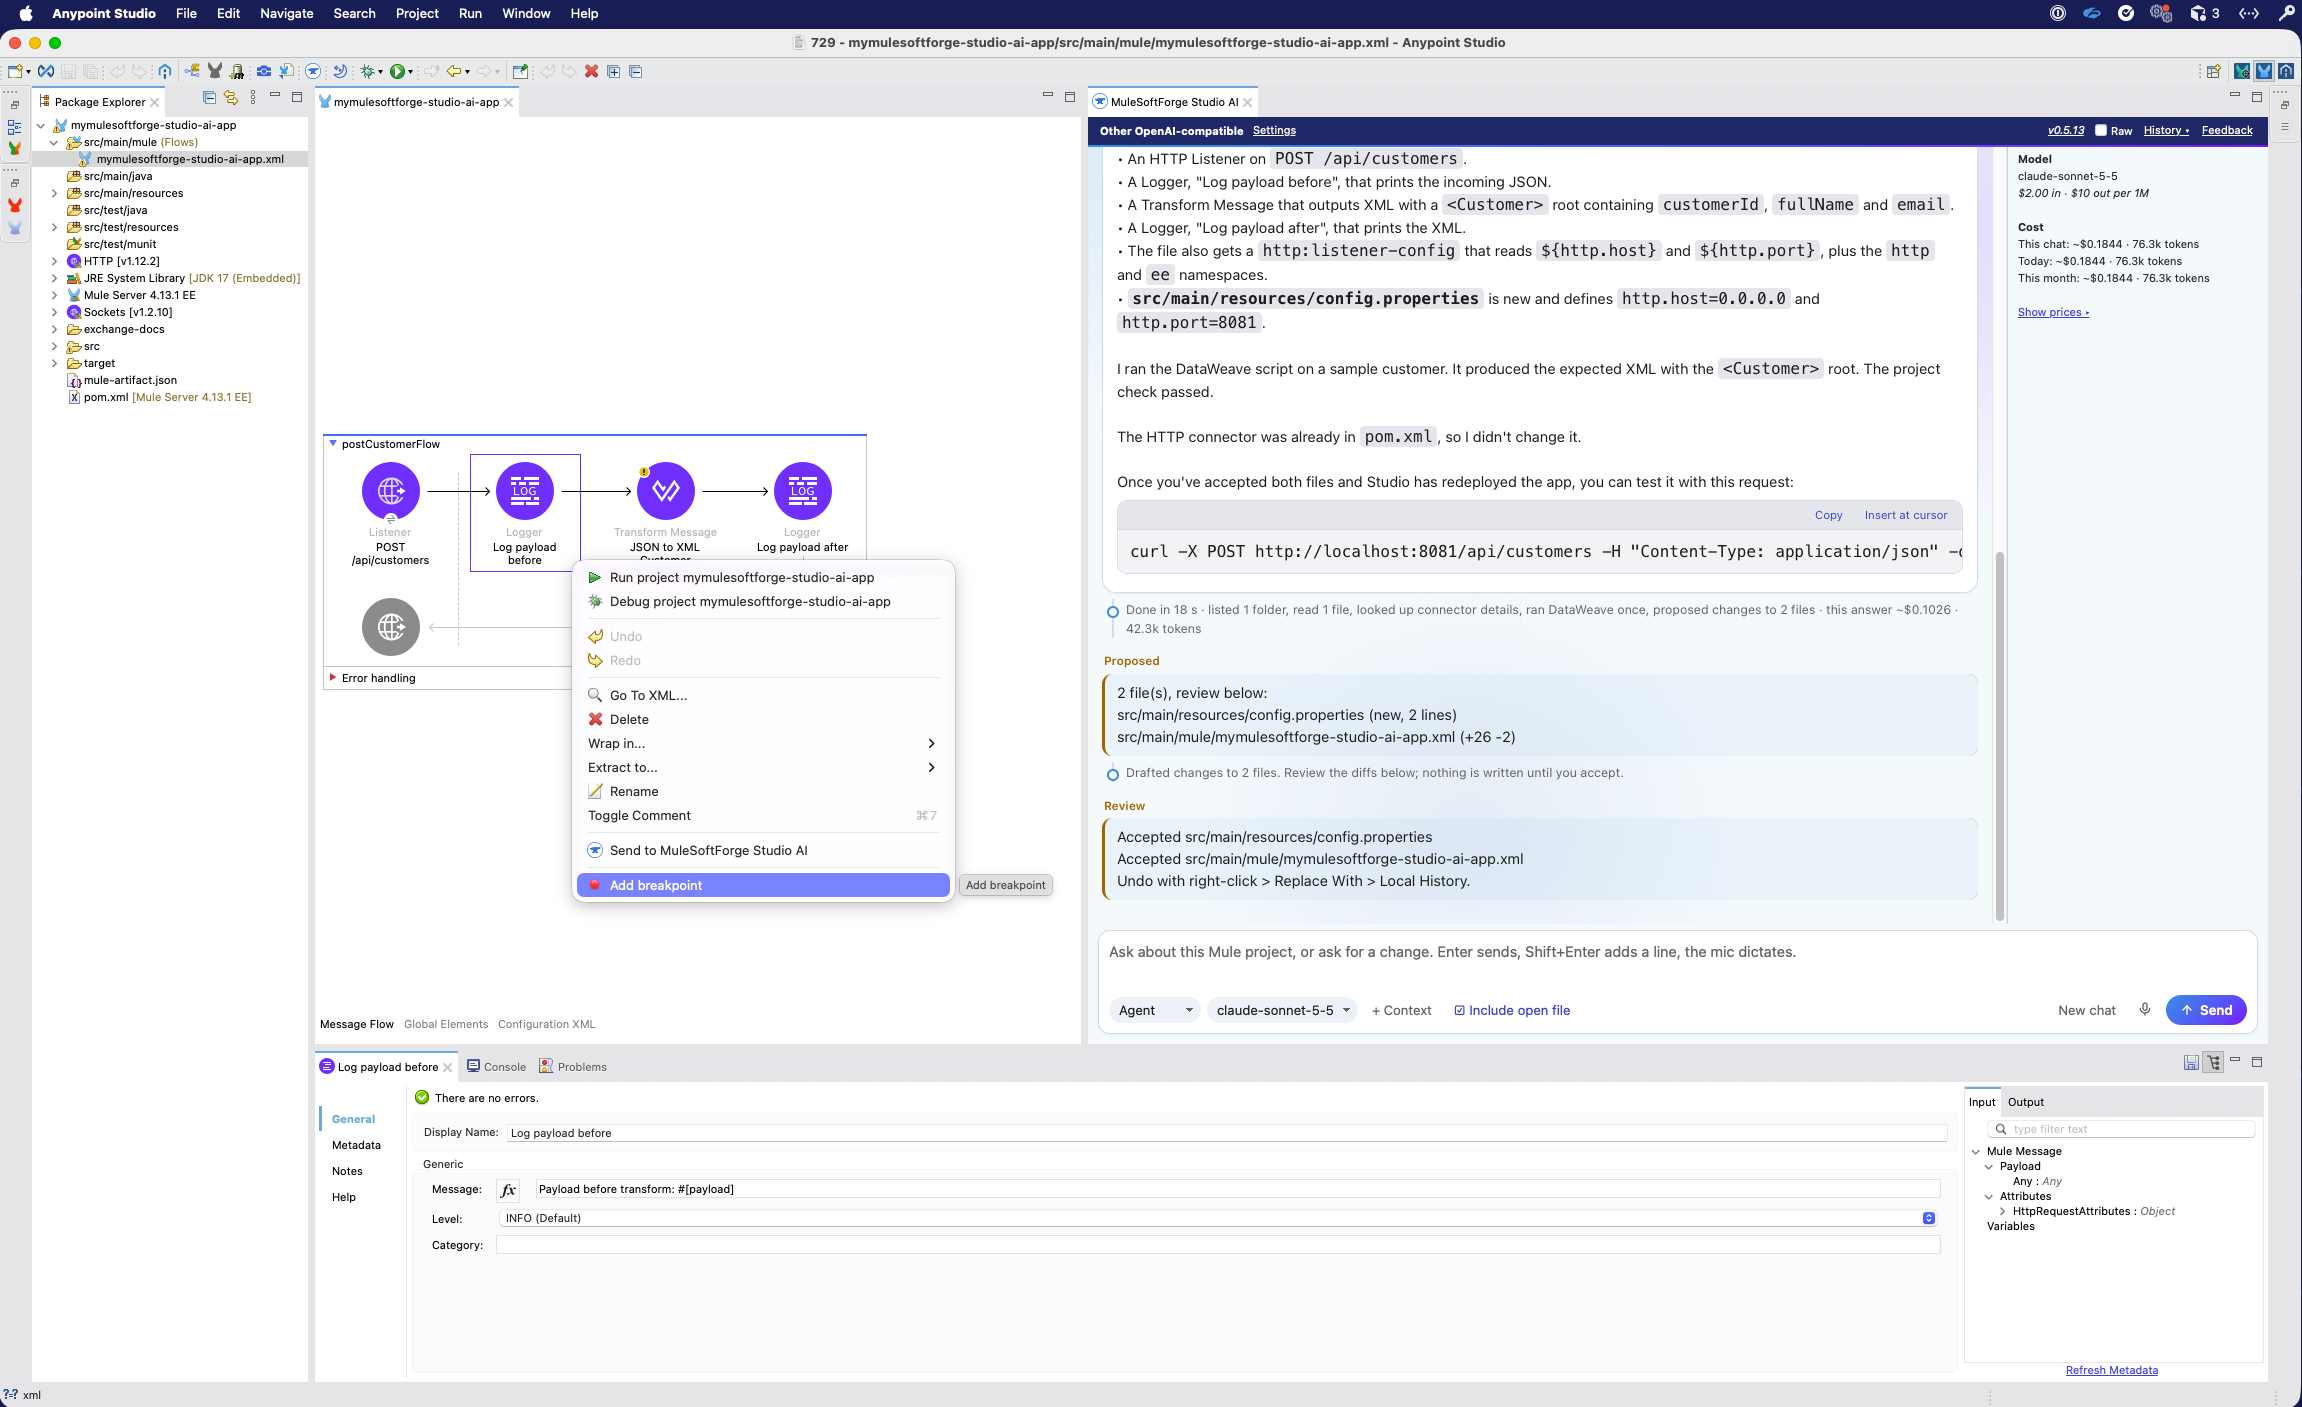
config.properties(new) and the flow XML (+26 −2). The answer includes acurlcommand for the test. Click Review or Accept. - The flow is on the canvas. The changes are accepted. The canvas shows the flow: HTTP Listener, Logger before, Transform Message, Logger after. You can undo with Replace With > Local History….
3. Run and debug with AI
Add a breakpoint, start a debug session, and ask Studio AI to call the endpoint. The debugger stops on the JSON payload.
Add a breakpoint
Right-click the first Logger (Log payload before) and choose Add Breakpoint.
All 7 steps as a list
- Add a breakpoint. Right-click the first Logger (Log payload before) and choose Add Breakpoint.
- Start the debug session. Right-click the canvas and choose Debug project mymulesoftforge-studio-ai-app.
- The app is deployed. The Console shows that the app started. The Mule Debugger waits for a Mule message.
- Keep Studio AI in the Debug view. Move the MuleSoftForge Studio AI view into the Debug perspective. The note says that the debugger is not stopped yet.
- Send the flow to Studio AI. Right-click the flow and choose Send to MuleSoftForge Studio AI. This attaches the XML of the selected elements.
- Ask it to call the endpoint. The flow is attached. Type
Call and DONT wait for Returnand click Send. - The debugger stops on the JSON. Studio AI calls
POST http://localhost:8081/api/customers. The debugger stops at Log payload before, and the JSON payload shows. Click Ask about this event if you want Studio AI to explain it.
4. Add metadata
Ask Studio AI for sample metadata for the Transform Message. Accept the files, then close and reopen the XML, run Project > Clean, and update Maven with Alt+F5.
Ask for metadata
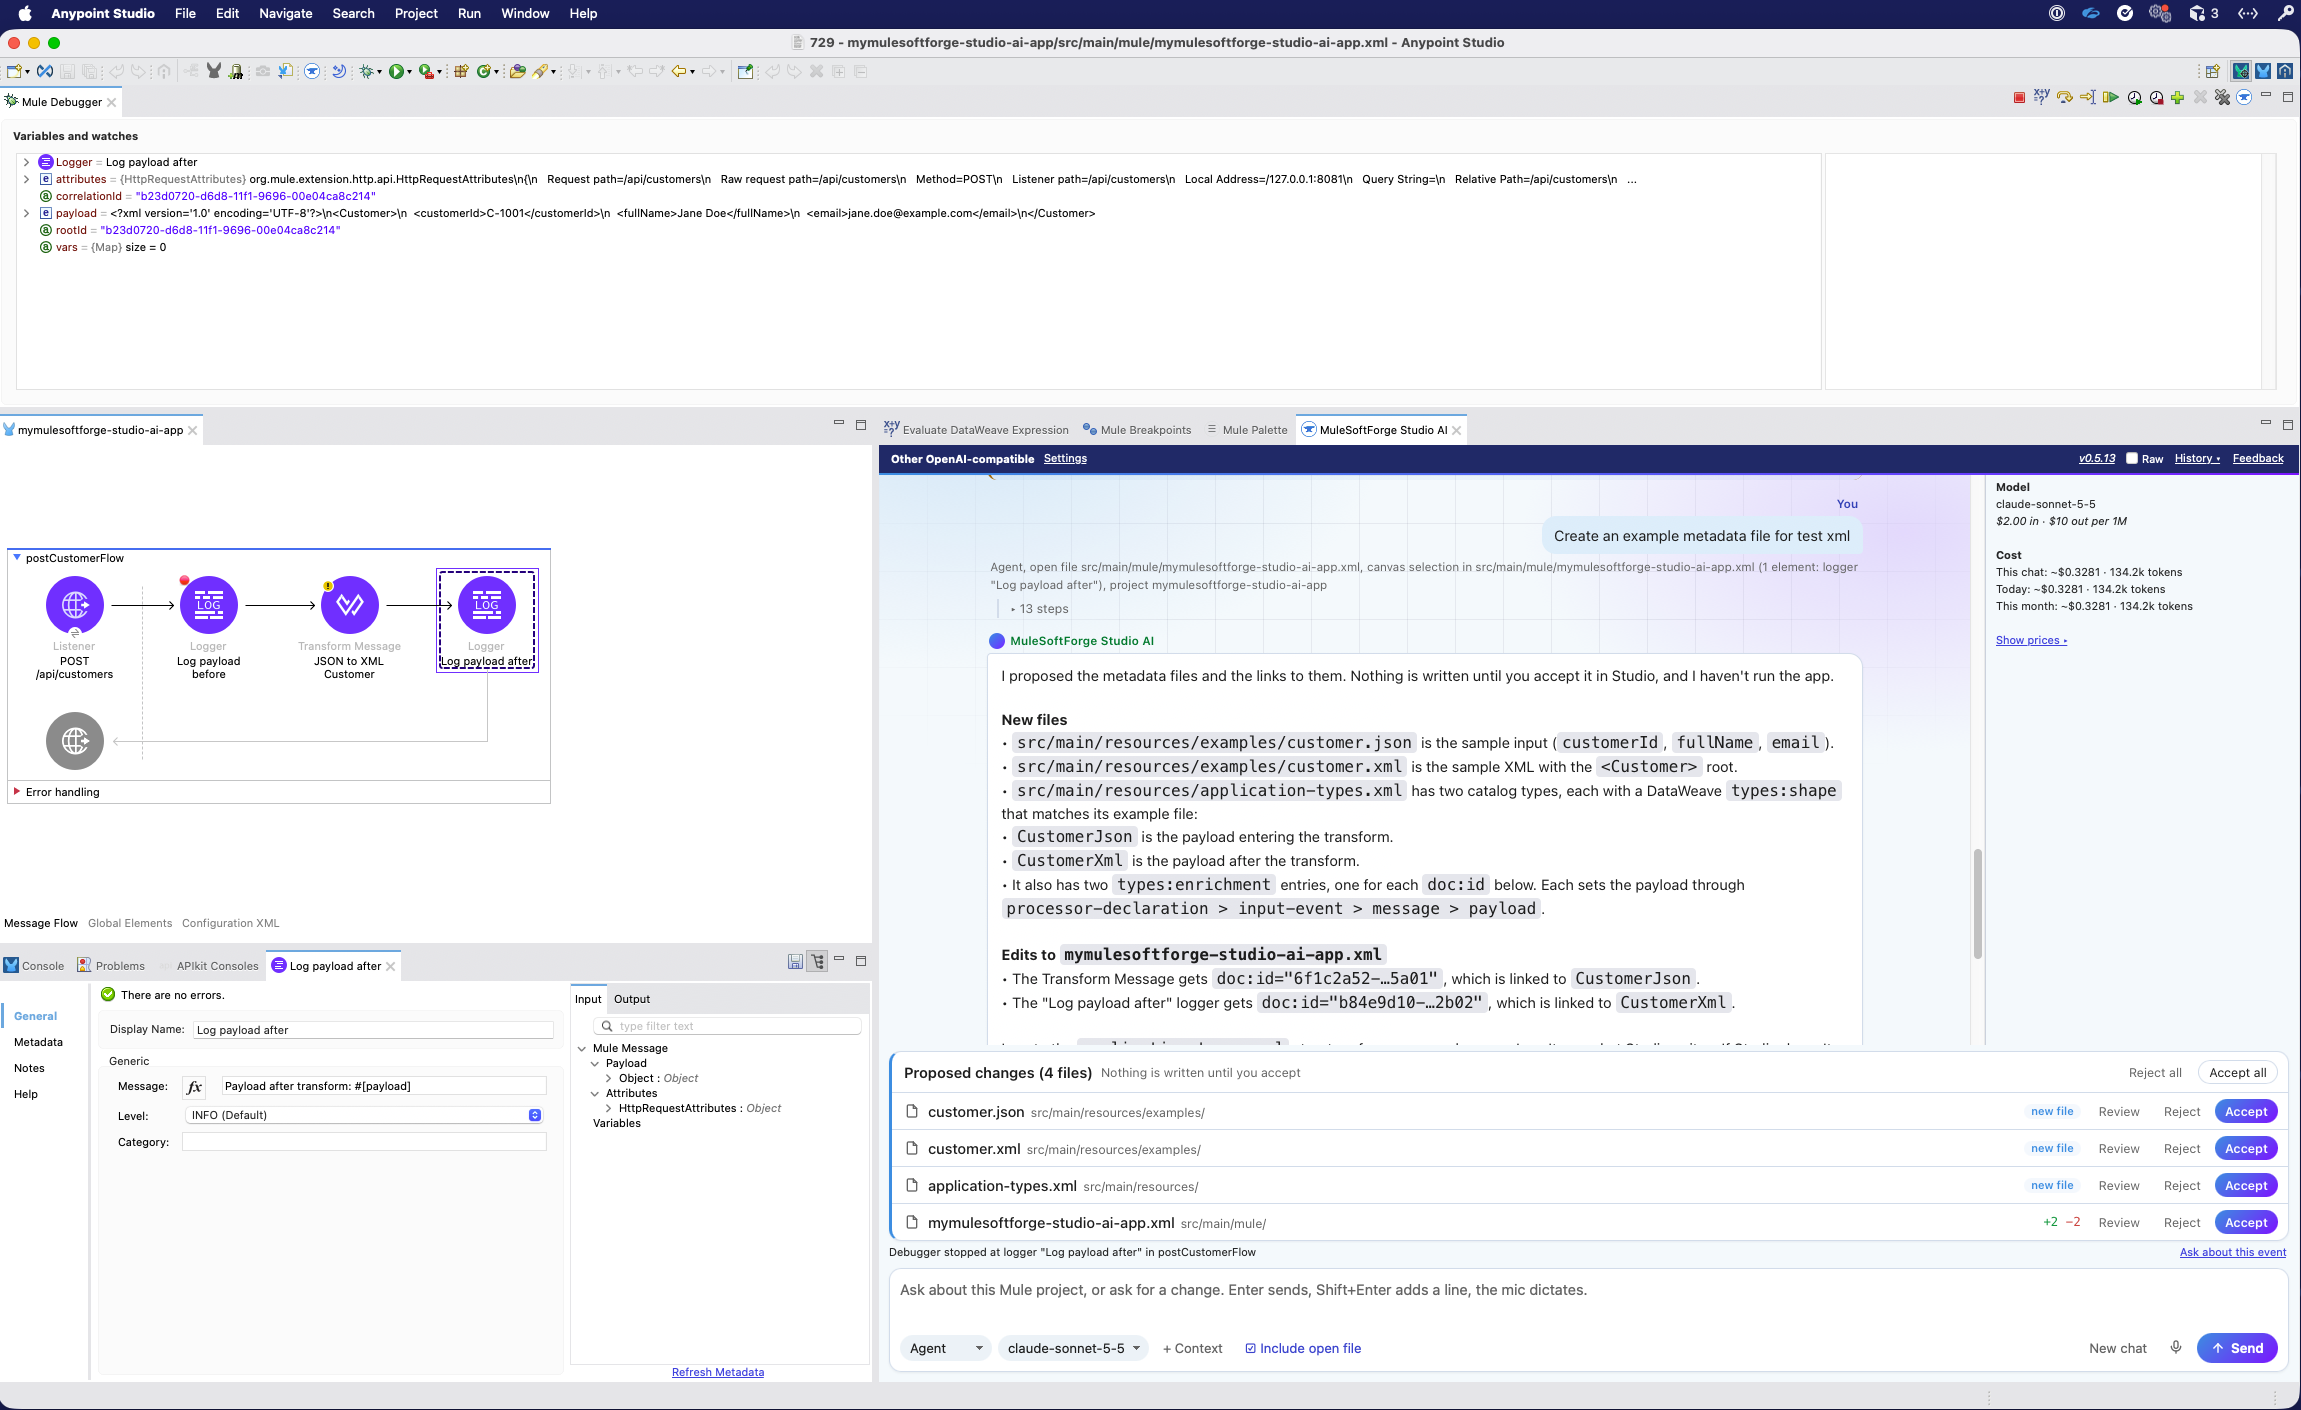
Step the debugger to Log payload after so the XML payload shows. Ask Create an example metadata file for test xml. Studio AI proposes 4 files: customer.json, customer.xml, application-types.xml and the flow XML.
All 3 steps as a list
- Ask for metadata. Step the debugger to Log payload after so the XML payload shows. Ask
Create an example metadata file for test xml. Studio AI proposes 4 files:customer.json,customer.xml,application-types.xmland the flow XML. - Follow the metadata steps. The answer follows the rules from Your instructions: close and reopen the XML file, run Project > Clean, and update Maven with Alt+F5. Stop the project first if it is still running.
- Metadata appears on Transform Message. Open the Transform Message. The input shows
customerId,fullNameandemail. The output shows theCustomerroot. The DataWeave editor shows 1 issue found.
5. Fix the DataWeave
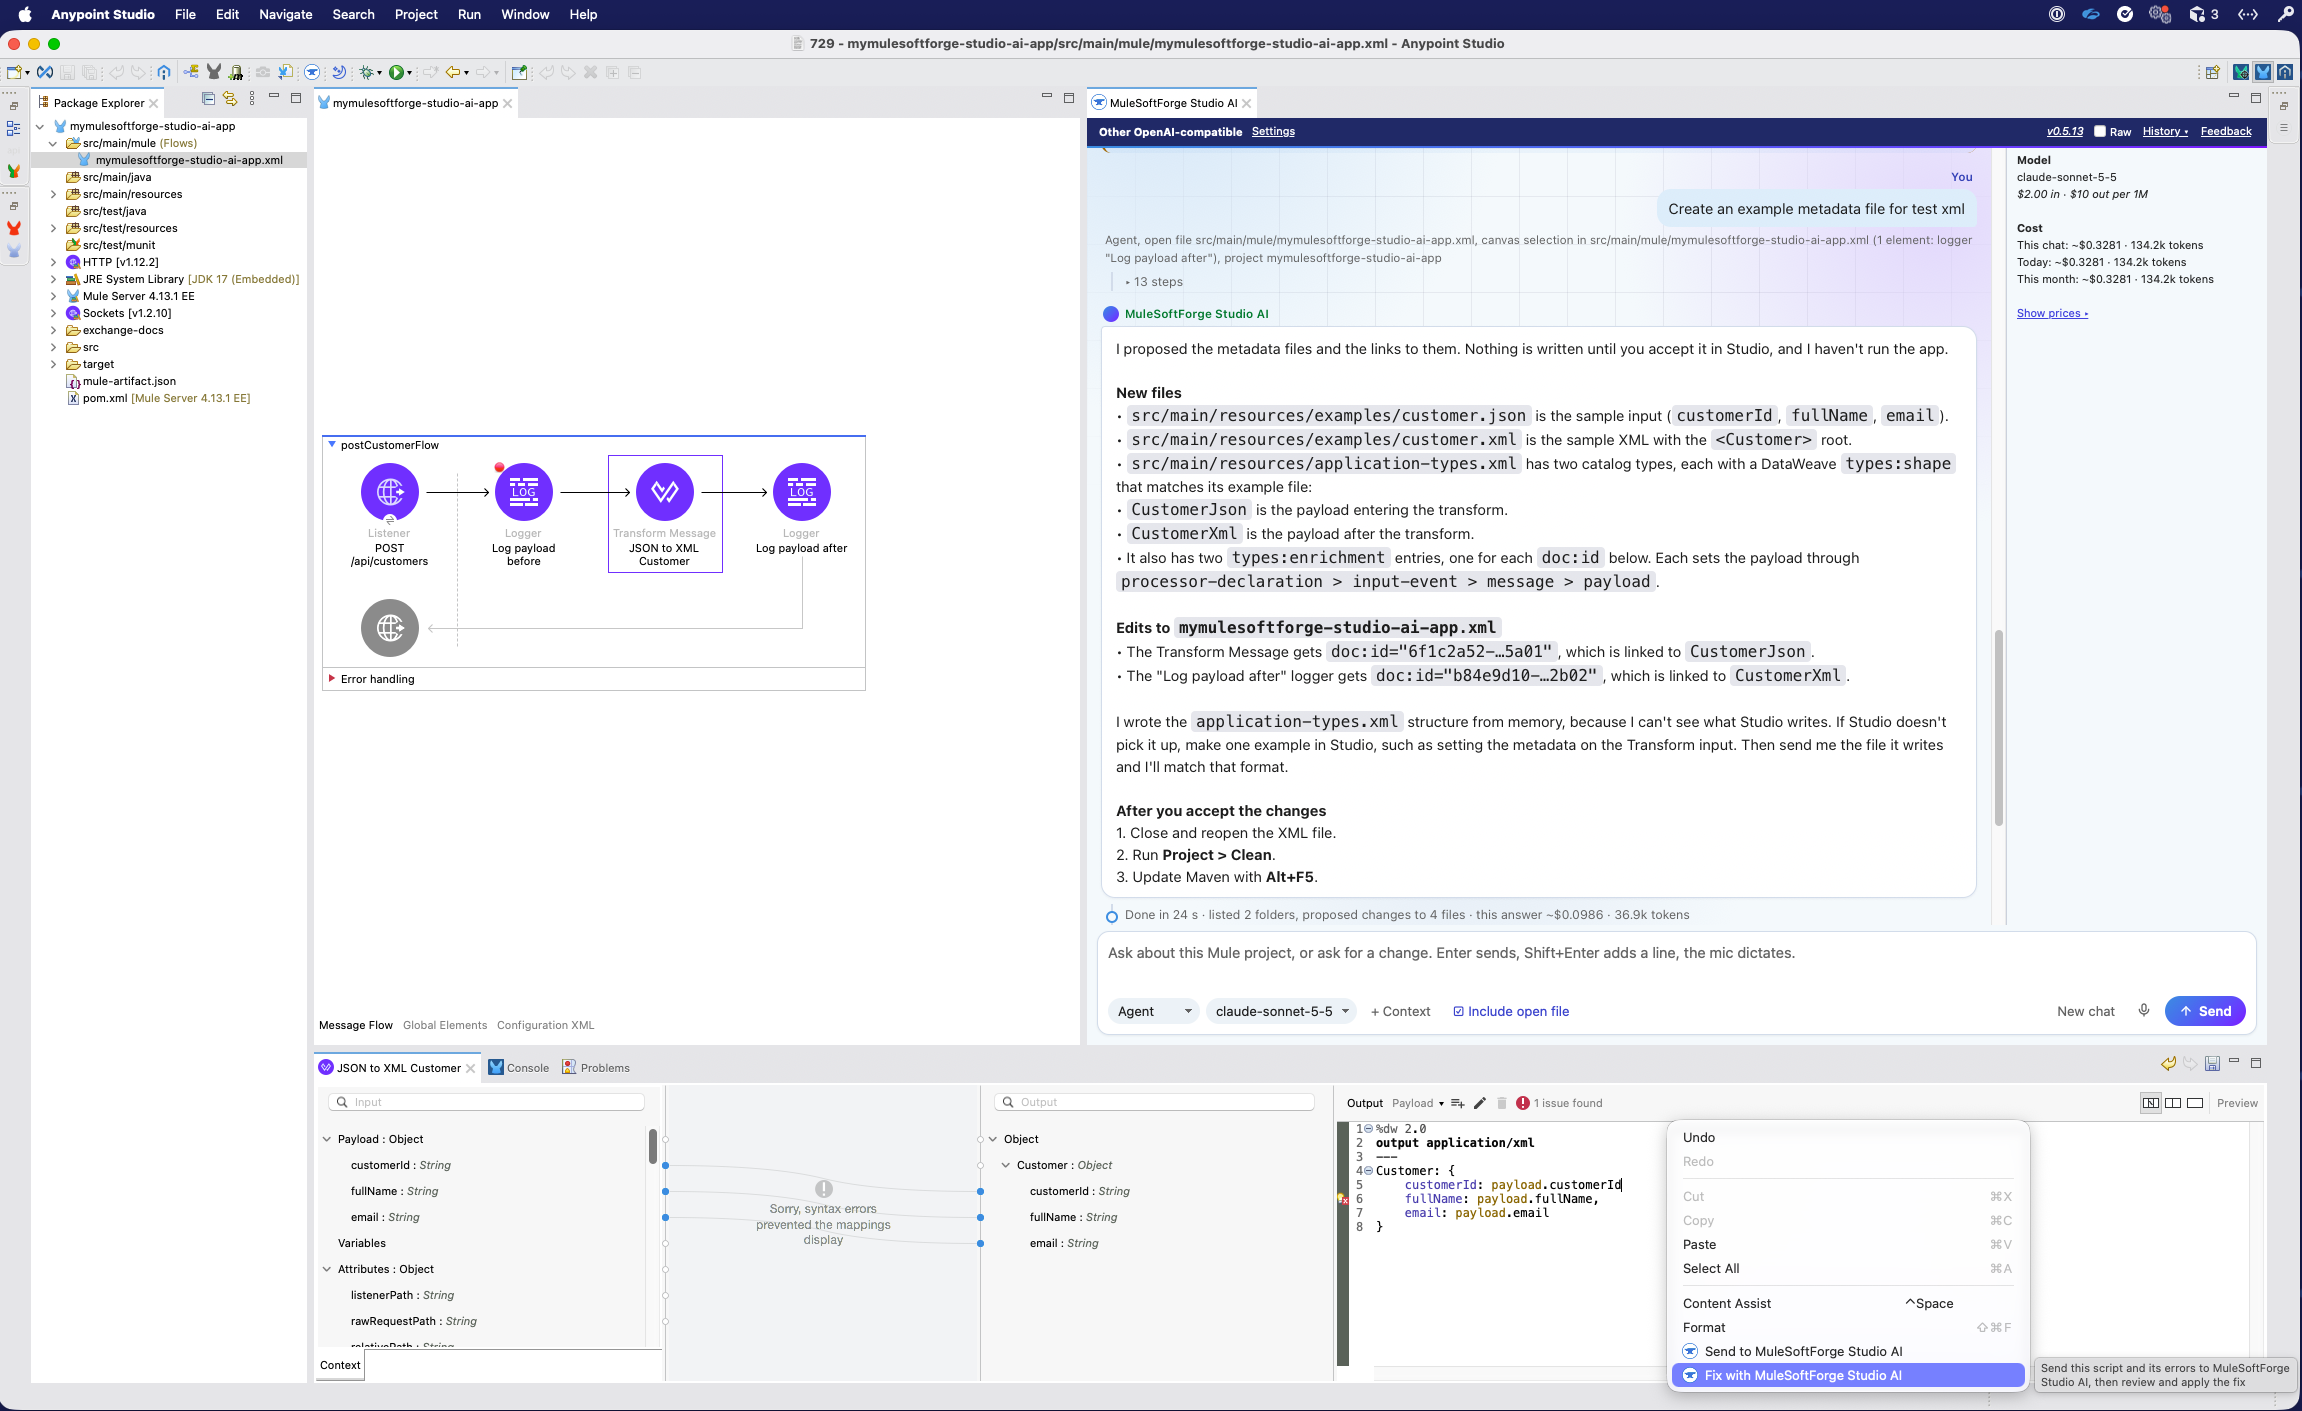
If the DataWeave editor shows an issue, right-click and choose Fix with MuleSoftForge Studio AI. Review the diff, apply it, and save.
Fix with MuleSoftForge Studio AI
Right-click in the DataWeave editor and choose Fix with MuleSoftForge Studio AI.
All 5 steps as a list
- Fix with MuleSoftForge Studio AI. Right-click in the DataWeave editor and choose Fix with MuleSoftForge Studio AI.
- The fix request is sent. Accept the 4 metadata files if you have not yet. The fix request goes to Studio AI with the DataWeave script and the editor problems.
- A comma is missing. The answer says that a comma is missing after
payload.customerId. Click Review diff or Apply to the DataWeave editor. - Review the DataWeave diff. Review diff opens the DataWeave Compare window. The proposed fix adds the missing comma. Click OK.
- The fix is applied. The mapping lines connect, and the issue is gone. Save the file to keep the fix.
Next: use the chat.